|
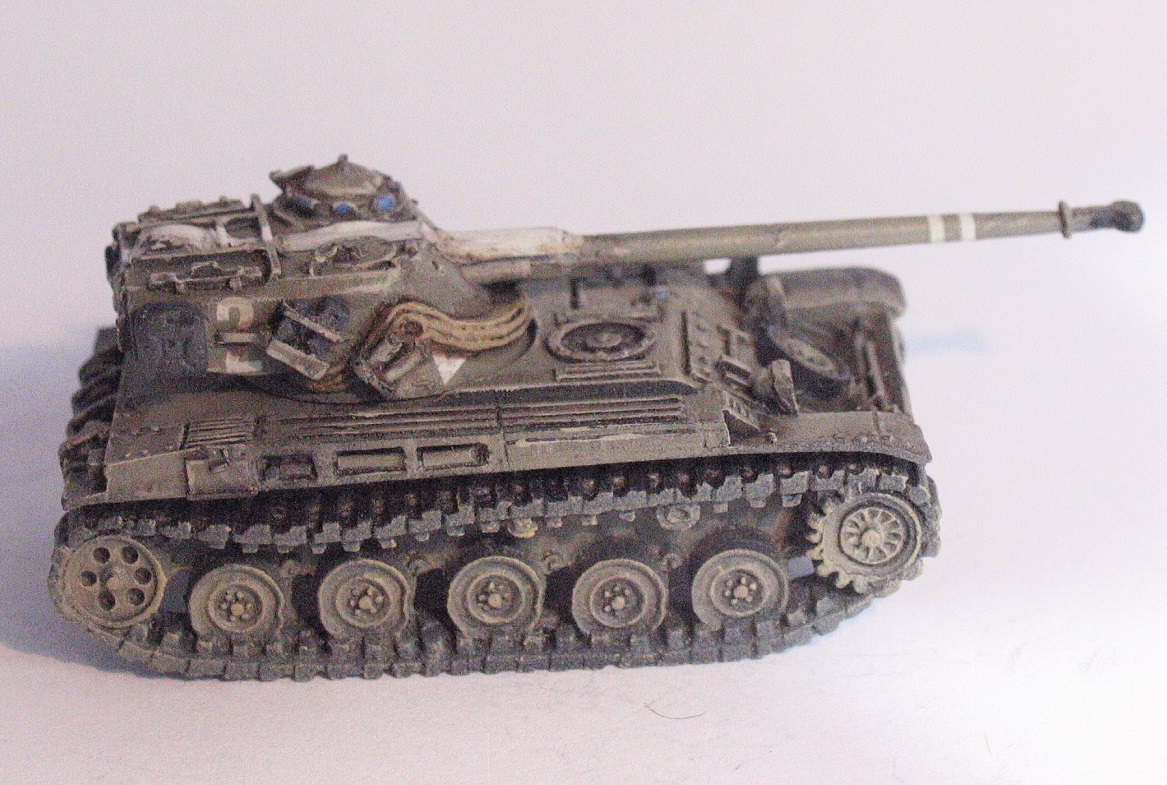
| This guy blew my mind... |
The other week me and my friend and opponent - Mr. Krieger - played a Flames of War game, and since I'm really looking forward to the coming cold war version of FoW, "Team Yankee", I wanted to play the next best thing - the Arab-Israeli war of 1967!
Now, we decided that Mr: Krieger would play the Israelis, while took command of the egyptian (or United Arab Republic(s), actually) heavy armour.
We decided on about 1400 pts each - mostly since thats all my UAR-forces can muster. It's an expensive army! The Israelis have been seen here in my last post, and being super-duper-shots-with-veterans are quite cost effective and quicker to paint...
These were the Israeli tankers:

Eight tanks - of which four are a real pain in the bum (front 12, AT 18!) - and nine infantry bases, including two belgian bazookas!
Against this armoured spear plowing through the Sinai desert were these Egyptian warriors:

Thats 25 tanks, 29 if you count the armoured transports, supported by four bases of infantry with a...Belgian bazooka (was there a discount on Blindicides around -67 or something?). If that wasn't enough, some MIG's have managed to get airborne, despite the Israeli air fighters clutteirng the desert skies.
Eleven tanks are heavy Iosef Stalins, with an impressive front armour (13 in FoW), and an AT 15 gun. The other tank company is nine T-55's, with front 12 and AT 16. Still, all of those tanks have only ROF 1, and are rated conscripts - making them very easy to hit (2+).
 |
| Forward! Counterattack! Push the Israelis back to the sea! Throw better dice! |
So, on to the battlefield! My desert board is a bit smaller than 6x4, being rather 5x3,5. Still, its big enough, and being the Sinai desert, I chose to keep some open areas. I put a road and a town next to it, in the midst of the board, making a good reason for the fighting to take place here! Capturing this town is probably vital to the Israelis if they are to keep their momentum.
 |
| The battlefield before setup |
I think we rolled for a scenario, which was Dust Up - the table is divided into quarters, and each side places an objective in their and the opponents deployment quarter. Half of each force must then be placed in reserves. These arrive from opposite the starting quarters. The goal is simple - take an objective in your enemies corner, while defending your own!
I chose my T-55's and the AA-tanks as my reserves, deploying the recon company and the IS-tanks to guard the objective. With their heavy front and side armour, they should be a real tough nut to crack. The recon company will use their spearhead move, to try a flanking maneuver, or just generally keep the pressure on the Israelis, perhaps forcing them to make a mistake.
Mr. Krieger chose his infantry to deploy on the board, digging in, smoking cigarettes, and drinking some water in a oasis. Since warrior teams do not count as platoons, the first and second in command S'hots should be able to hold out until the rest of the S'hots arrive.
 |
| Both forces set-up before the battle commences |
The first two turns started with the UAR forces moving forward using the spearhead move, hoping that the Israelis would miss, or at least not focus on the Stalins! The Israelis however quickly dispatched two PT-76's and the leading BTR50, bailing one tank on the first turn. Then they went on and wrecked an IS-3 and bailed another... However, the bailed PT-76 kept being bailed, keeping that platoon in play for a while longer.
Seeing the IS-3's getting hit by Israeli deathrays, I moved back the Stalins, hiding them them behind the safe walls of the town. Yes, I'm a coward, so sue me!
 |
| End of the second turn... |
The Egyptian turn 2 started good though, with the T-55s arriving from reserves. They immidiately moved forward, manage to get into range and even roll a six - killing the commanding S'hot! And if that wasn't enough, a flight of MIG-17's swoop down, aiming for the other, killing it in a hail of cannon fire...
 |
| Ka-blam! The T-55's score a hit and kill the Israeli commander! |
 |
| The MIG (yes, I know its unpainted!) manages a straight hit into the Centurions weak rear top armour... |
...however, on the Israeli turn 3, the two reserve S'hots arrive, avenging their falling comerades. Still, things looked good for me!
 |
| The next batch of Israeli S'hots roll out, guns blazing |
On the Egyptian third turn I moved forward the T-55's, aiming straight for the objective, while my IS-tanks started to slowy move towards the lower edge of the board. My plan being to secure that end off the table against the AMX's (soon to arrive from reserve), and after that move along the narrow lane between the town and the hill towards the objective.
 |
| This was the end of the Israeli turn 3, if my memory serves me right... |
On the following turn, the T-55's managed to take out one more S'hot, while moving onto the objective. Those stabilizers surely make a difference - despite the ROF1 one can hit enemies on 5's and 6's, much is better than not at all! Mr. Kriegers AMX-13 light tanks also rolled out, with an intention to flank the T-55's - but the last S'hot retaliated, finishing off another two T-55's and forcing the three remaining Egyptian tanks to go home.
However, spirits were high in the Egyptian command. With only one S'hot left, the fast-hitting AA ZSU-57-2 tanks rolling in and most of my IS tanks on the table - the only real threat (I thought) was the AMX tanks.
 |
| End of Turn 4 - I've hid the ZSU-57's behond a flaming IS-tank, in case the AMX's were to make a silly move. The IS tanks continue to slowly roll around the edge of the town walls... |
Turn 5 was here, and the AMX-tanks moved out, ready to charge the Stalin-tanks in the next turn. This didn't worry me much though, since the AMX-tanks, with only rather weak cannons (AT14, ROF1) could only damage the sides of my Stalins (with side 11 armour!), at best. The S'hot tried to kill my heavies, but missed.
On this turn, I did however start to feel the problem of moving 10 slow going tanks through a small lane. I didn't want to risk any bogchecks (I tend to roll 1's then), so there was no tank that moved through the walled garden either. Still, if I can fend off the light tanks, nothting will stop me from pushing the IDF back home!
 |
| I should have moved the ZSU's from that objective... |
As I had hoped for, the AMX's tried to flank my Stalins - only to be shot to pieces and forced to retreat, with no real damage done to my heavy behemots. The deciding shot came from the last PT-76, from that unfortunate recon company, still hiding in the town. One IS-tank was blown up by that S'hot, still, nothing to worry about. I poured us some Ouzo, thinking that Mr. Krieger might need some reconciliation.
 |
| The AMX-13 tanks are routed or destroyed. As the AA-tanks finally move, in order to support the attack, I was confident that nothing could stop me from winning! [SPOILER - I was wrong...] |
So, turn 7. Two Stalins manage to roll onto the objective. The S'hot takes up a good shoooting position, where he can only see those two tanks as his closest targets, forcing me to apply any taken hits on them. Using the centurions stabiliser, he scores two hits (only 3+, even though moving) and kills them.
That's ok.
There's plenty more left.
Right?
 |
| Well this is annoying. Moving backward isn't an option though, not with these slow beasts, conscripts and all. Once this company started moving, there wasn't really much left to do but keep on forward |
On the Israeli 8th round, that single Israeli hero managed to hit and kill my commander. Bailing out of the burning wreck, I continued to shout my orders. Or at least I like to imagine I did.
The S'hot made a nice Israeli stormtrooper move, and moved out of my line of fire.
Trying to make our Soviet advisors proud, the UAR moved on, while the ZSU's sneaked round the hill, hoping for a flank shot. The MIG-17 flight returned, again swooping down on the single S'hot....and missed. No worries!
Well, exept that I no longer had any commander.
And that tank was still alive.
 |
| That MIG will miss. However, a base of IDF infantry was gunned down by the Stalins, as they contested the objective. I was again in control of our flag... |
The Egyptian commander, problably wounded and without any radio, forced the recon company move out and assault the enemy infantry that have moved forward, contesting the objective and even digging in!
Now, a wiser commander would have been satisified with only taking up positions next to the Israelis, using the hull mounted guns and the las PT-76 to dig them out of there.
Maybe that Ouzo was a bad idea?
I don't really remeber, it's all kind of hazy, but the S'hot killed some more IS-tanks, before hiding further back behind the oasis.
 |
| Egyptian turn 9 - CHARGE! They can only hit you on 2+ in defensive fire, what could possibly go wrong? |
As I should have realized, charging an LMG and angry dug in FN-FAL rifle teams meant that all of the Egyptian infantrymen went down, forcing the company to roll a morale check. This they promptly failed, and drove home as fast as the soviet engines could carry them.
The IS-tanks however, even though losing more than half of their tanks, managed to suceed their morale check and stayed on the board.
So, on the last Egyptian turn, my IS-3's rolled onto the objective. Their next target was to shoot and possibly assault the IDF infantry.
Now, the ZSU's sped round the hill, hiding behind a flaming wreck, ready to flank shot that... S'hot. Mr. Krieger had carelessly exposed his turrets side, making it possible for my AT11 guns to take him out. I only have to hit the tank (with four shots on 5+), hit the turret (4+), and hope that Mr. Krieger rolls below 5+ for me to win. Oh, and I have to roll a good firepower test too. Not the greatest odds, but I was growing desperate - even if the IS-tanks defeat the infantry, that S'hot could easily take them out in the next round and any further lost tank meant another morale check.
The IS-tanks shot the IDF-infantry dead.
Good.
Then the ZSU's fired, and missed.
That's bad.
Really bad.
The IS-tanks made an "shooting to sucessful" move, regrouped on the objective and we all waited for the return fire from that damned, stinking, evil, super-s'hot.
 |
| Egyptian turn 10, right before the shooting phase. |
Blam. The Israeli tank slowly turned his turret, took aim, and blew the Egyptian tanks into smitherines.
Seeing this, the four remaining UAR tanks - since long missing their commander - automatically failed the force morale at the beggining of the Egyptian turn, and fled back the way they came.
I had lost.
To one, single S'hot. That tank managed to take out 6 IS-3's and two ZSU's, winning the battle almost all by itself! Impressive.
 |
| Israeli turn 11, right after the shooting phase. |
The battle ended as the Israeli forces moved in to the now undefended town, opening the route for following IDF forces. Losses were heavy, but the Egyptian counter attack had been thwarted...
 | ||
| After the battle, the area is littered with burning wrecks... |
 |
| ...as the remaining Israeli forces plan their next move - yes, mr. pointing-infantry-guy, no need to rub it in! |
All in all, an exciting and very entertaining game. Sure, we problaby missed some rules, and I should have used my units much better - but I always enjoy a game that has it's own narrative, instead of the metagaming so common in pointbased games like FoW.
We both had great fun, and I didn't mind losing at all - it could have gone either way right to the last round. In the end, it was one s'hot too many...
Now, I should finish the last half-painted units in my UAR-army (including that MIG) as we all wait for Team Yankee!
Cheers!
/Bartosz